
Hypertext markup language, better known as HTML, serves as the baseline for all webpages accessed on the internet. HTML code uses a series of opening and closing tags (< />) to determine the beginning and end of elements, or parts. HTML usually works in conjunction with another language, CSS, or Cascading Style Sheets, to enhance the page’s design with colors, fonts, and layouts. Rounding out the popular trio of languages for coding novices is JavaScript, a more advanced programming language which implements interactive components. All three languages can join together to create an appealing and dynamic webpage.
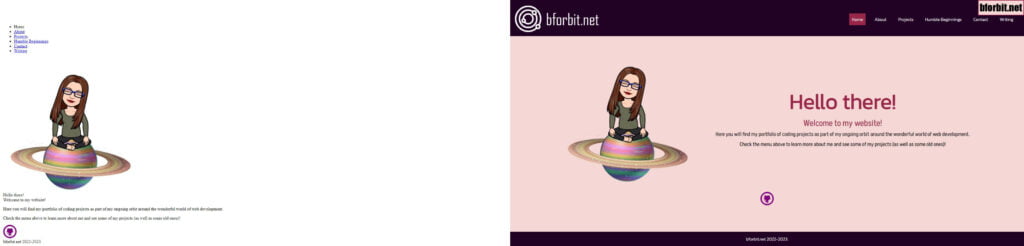
“Learning to code” is a statement used often in today’s digital world as our society becomes more engrossed in technology taking over many aspects of our everyday life. Not everyone will find their niche in coding. For those curious about web development, examining HTML code can shed some insight on what it’s like to create a webpage. In this tutorial, we will focus on basic HTML practices and create a simple page using a few essential elements. Think of HTML as the skeleton of a website. It may not look like much, but once the bones are set in place, the page can enlist the help of stylish CSS and the interactive coordinates of JavaScript to become a fully formed webpage. Below is a comparison image of my website’s homepage and the difference between using HTML and using the code with an additional language.
To begin coding, you may use a simple text editor installed on your computer. For Windows users, Notepad is a suitable application to use. Apple users can access a similar program called TextEdit. The following demonstrations will showcase Notepad.
As stated earlier, HTML relies on opening and closing tags to define the beginning and ends of certain elements. On the blank screen, we will start by defining the document as HTML with opening and closing tags, along with some space in the middle:
<html>


</html>
Opening and closing tags in HTML are akin to the popular Matryoshka dolls, or nesting dolls, where one large doll opens to reveal a smaller one, followed by another, and so forth. Not surprisingly, opening and closing tags are also referred to as nesting tags, for they have the capacity to contain other tags. In this case, the opening and closing HTML tags we just typed will feature all other tags on our webpage. This is why including some extra space in between is ideal, since we will be adding more parts. The ending tag, showcased with the slash (/), indicates the end of the element. No code exists beyond the ending HTML tag.

Inside the main HTML tags are two important components of the webpage, the head and the body. Both the head and body tags are written similarly in code form with the head’s opening and closing tags at the top followed by the opening and closing body tags, as demonstrated below:
<html>

<head>

</head>

<body>

</body>

</html>
Notice how each tag contains space in-between. This is entirely optional. In HTML, spacing between words is recognized in the browser, but paragraphs are not unless you include tags specifically related to spacing. For now, the spacing within our text editor serves as a visual aid. You may use as much space as you want as you code, if it helps you recognize the parts more easily.
The head element plays an important part in HTML as a holding area for various data and documentation, like links to the stylesheet (CSS) and metadata. For the purpose of this basic tutorial, we will only use it to introduce the title tag. The title describes the title of your webpage and appears on the top outer border and/or tab in your web browser. I will call this example “My Page.”
Nested within the head, we’ll add this new tag and include the title. You may include the end title tag either on the same line or on a separate line, as long as the tag contains a slash to finalize the title and it appears before the ending head tag.
<html>

<head>
<title>My Page</title>
</head>

<body>

</body>

</html>
We now have a simple but solid foundation of our web page. To save the web page, click “File” and “Save As” in your text editor.

Find the location on your computer that you would like to save your webpage. I created a new folder called “html-documentation” and navigated there to save this webpage. It’s good practice to appropriately name your webpage. All main pages on the internet use the name “index” followed by the extension “.html”. Index is a keyword recognized by browsers as the default page to display first. The .html extension lets the computer know your file is an HTML document and the code within must be translated as such.
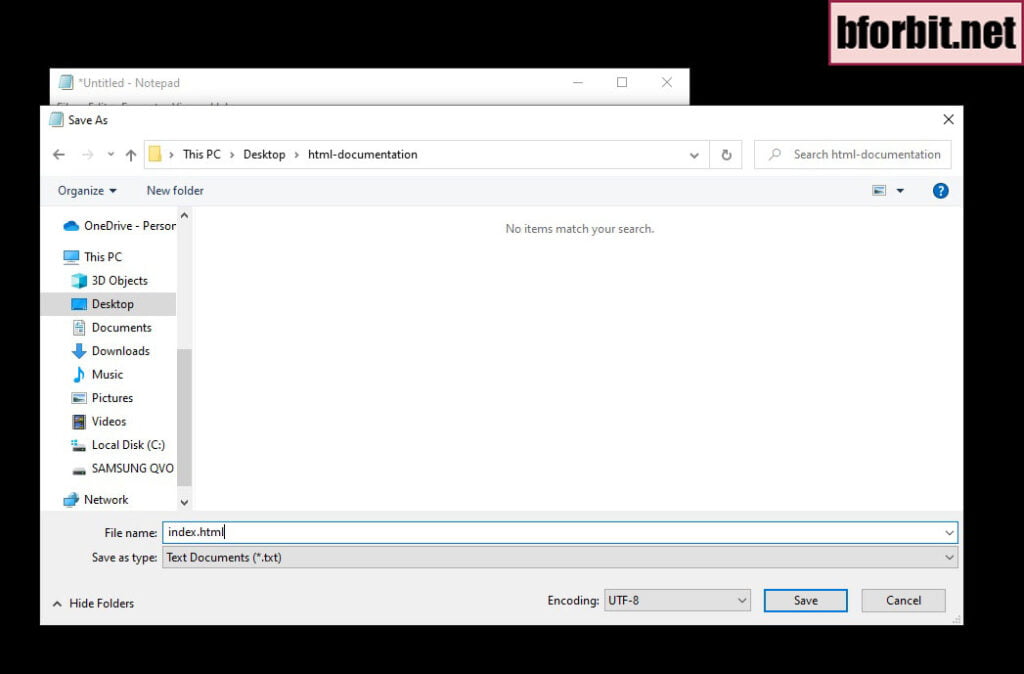
Once, you’ve typed “index.html” as your page’s file name, click “Save.” Navigate to the file’s location and double-click on your file “index.html.” The file should immediately open in your default browser (Microsoft Edge, Mozilla Firefox, Google Chrome, etc.).

You’ll find an empty screen, which is exactly what it’s supposed to look like at this stage. Only the main tags are included in your code with no content (yet). However, look at the top-left of your browser. You should see “My Page” displayed. This is your title tag in action.
Let’s return to your text editor. If you have already closed it, simply navigate to the location of your file on your computer, right-click on the file “index.html,” and open with Notepad or your preferred text editor. You may leave your browser open if you prefer.
We explored earlier that the title tag is always included within the Head, along with special scripts and metadata. We will move forward from the head to the body. The Body is especially important in HTML because the main content resides here. We will explore a few essential elements involving text, paragraphs, hyperlinks, and images in order to add content to our webpage.
After the opening body tag, add some space by pressing the Enter key (if necessary), and type a sentence of your choosing. Tags are not necessary for now. The sentence chosen in this example is “It’s a magical day!”
<html>
<head>
<title>My Page</title>
</head>

<body>
It’s a magical day!
</body>

</html>
Save your file, and re-open in your browser to view the changes. If your browser is already open, click the Refresh button to update your saved changes. Your webpage should no longer appear blank but include the words you just typed in the default font and size.

Congratulations! Your webpage now contains content, but it’s only one sentence. Let’s return to the editor and add a second sentence, but before that, we’ll press Enter and add some space below the first one.
<html>
<head>
<title>My Page</title>
</head>

<body>
It’s a magical day!

I am learning something new.
</body>

</html>
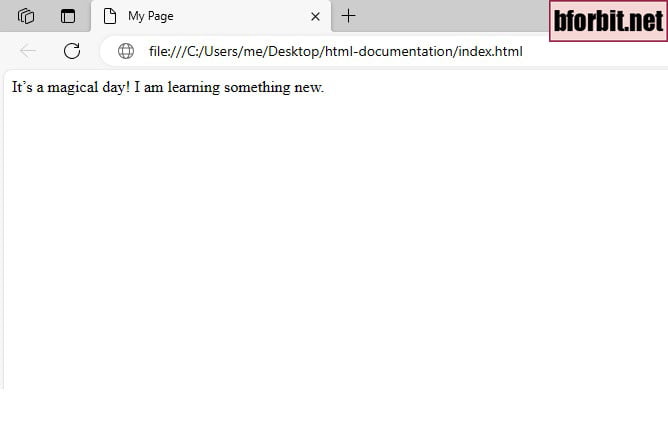
Just like before, save your page and open your file in your browser, or click refresh if it’s already open. What do you see? Your second sentence should be right next to your first sentence, but why is that so? Didn’t we press the Enter key to add some space in-between? The answer is yes, but as stated earlier, line spacing is not recognized in the browser unless you include tags specifically related to spacing. In this case, all of the times we pressed the Enter key was for our visual benefit. In the end, the computer doesn’t care how much you include in your coding file. If you want to see space on your webpage, you have to specify your desire for space using code.
Let’s do exactly that by nesting our second sentence inside a paragraph tag, represented by the letter p. This will create space for us:
<html>
<head>
<title>My Page</title>
</head>

<body>
It’s a magical day!

<p>I am learning something new.</p>
</body>

</html>
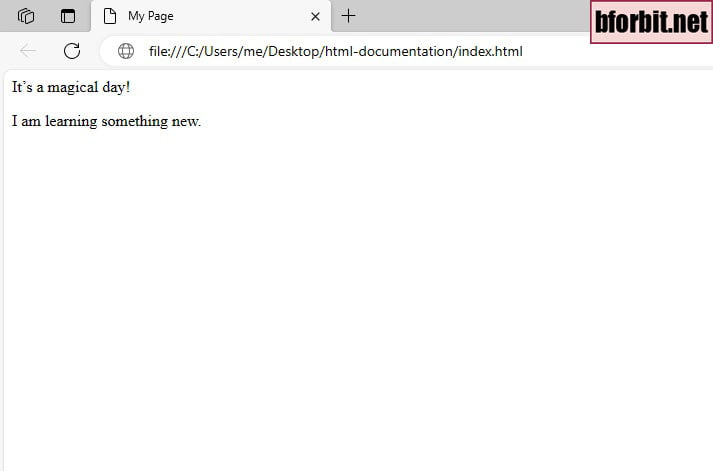
Now our second sentence, “I am learning something new,” is placed inside an opening and closing <p> tag. Revisit your page to observe what happens. The first and second sentence should now be separate from one another with extra space above (and also below). The Paragraph tag is a very popular tag in HTML for keeping blocks of text separate.
A similar tag is the line break element, indicate by <br>. This sends elements to the very next line without creating space above and below. Line breaks do not require an ending tag.
For example, let’s click after our first sentence and add some space. Then type a new sentence directly below our first sentence using the <br> tag:
<html>
<head>
<title>My Page</title>
</head>

<body>
It’s a magical day!

<br>It’s time to code.

<p>I am learning something new.</p>
</body>

</html>
Our new second sentence, “It’s time to code,” contains a break tag underneath our first sentence, “It’s a magical day.” We added space in our code to keep each part separate, but in the end it will not reflect on our webpage. Open or refresh your page to find your second sentence directly under the first. Our third sentence still contains a healthy amount of space above due to the paragraph tag.
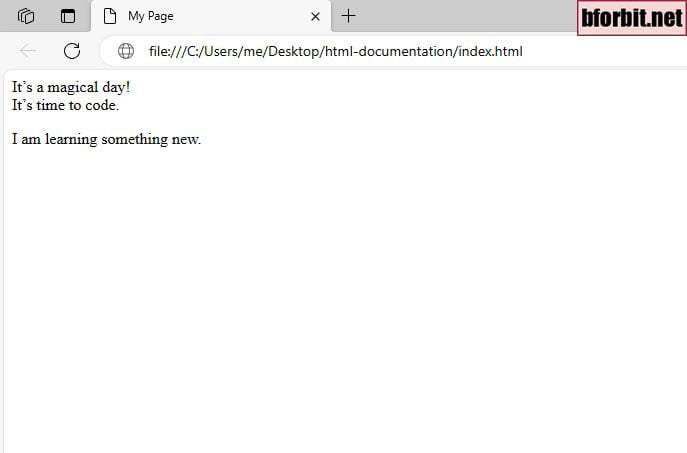
Our three sentences look great, but they are the same size. How can we increase the font? Most coding professionals resort to CSS to make font adjustments, but here we will keep it simple and use heading tags. Heading tags include the letter h followed by a number between 1 to 6, 1 being the largest size and 6 being the lowest. An example of a heading is <h2>, meaning it’s the second largest heading size. All heading sizes include a closing tag (</h2>), otherwise all text that follows will be of the same heading size.
In the example code, I am going to choose h1 as my heading, but feel free to try each heading number and pick one you like. I will type a new word below my paragraph: “Technology.”
<html>
<head>
<title>My Page</title>
</head>

<body>
It’s a magical day!

<br>It’s time to code.

<p>I am learning something new.</p>

<h1>Technology</h1>
</body>

</html>
View your webpage after adding your heading. Does the word appear larger? Notice the space above created by the paragraph tag.
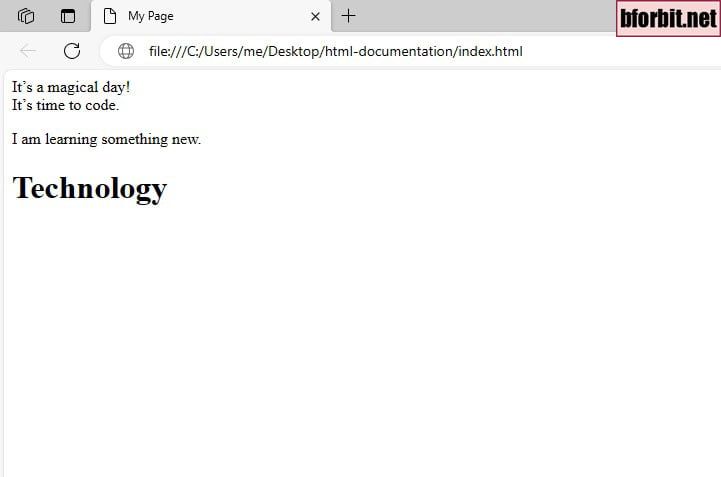
So far you have learned how to include content in the body of your webpage with text, paragraphs and line breaks, and headings. You also added a title to the head of your page, which appears in your browser window. This is excellent progress! Now we will learn two more popular elements found in most webpages, hyperlinks and images. Hyperlinks are also known as links and URLs (Uniform Resource Locator), and they redirect the user to another website by transforming simple text to a clickable element. You have likely clicked on a few links in your time spent on the internet. Links normally change your mouse cursor from a pointer arrow to a finger pointer when you hover over the link.
In HTML, links are initially commanded by the letter “a.” More specifically, it’s the tag <a href=””>. This may look really complicated at first glance, compared to the other tags we used like <p> and <h1>, so let’s break it down:
“a” introduces the link in your code, and the reason is that it stands for anchor. Anchors are the key to establishing your link destination. “href” simply stands for hypertext reference. If you want to create a link, you have to establish where you want the link to send, or refer, you to. We follow up <a href> with an equals sign and quotation marks (=””), and we include the website link between the marks.
In this tutorial, I am going to focus on the popular shopping website, Amazon.com. I want to have a clickable link on my webpage to send me directly to the site. Let’s make this happen and add a new line to our existing code. I’ll start by creating another opening and closing paragraph tag, this time underneath our Technology heading:
<html>
<head>
<title>My Page</title>
</head>

<body>
It’s a magical day!

<br>It’s time to code.

<p>I am learning something new.</p>

<h1>Technology</h1>

<p></p>
</body>

</html>
Inside our new paragraph tags, we’ll nest our brand new hyperlink tag, beginning with <a href=””>. Inside the quotation marks, we will type the link address to Amazon’s website, https://www.amazon.com, followed by a greater than symbol, >. It’s very important at this stage to make sure your link is typed correctly. Any missing letter or character can contribute to a broken link and prevent the user from accessing the site.
<html>
<head>
<title>My Page</title>
</head>

<body>
It’s a magical day!

<br>It’s time to code.

<p>I am learning something new.</p>

<h1>Technology</h1>

<p><a href="https://www.amazon.com"></p>
</body>

</html>
You have just referenced a link to another website, but we’re not done yet. After the greater than symbol, we have to tell the computer the text we want to represent the link as it appears on our webpage. In this example, I will simply type the words “Shop on Amazon.” Don’t forget your closing anchor tag to mark the end of your link, </a>. Also ensure the ending paragraph tag occurs at the end of it all.
<html>
<head>
<title>My Page</title>
</head>

<body>
It’s a magical day!

<br>It’s time to code.

<p>I am learning something new.</p>

<h1>Technology</h1>

<p><a href="https://www.amazon.com">Shop on Amazon</a></p>
</body>

</html>
Save your webpage and reopen or refresh your changes in your browser. If typed correctly, you should see the words “Shop on Amazon” display in blue with an underline. Move your mouse over the text. Did your cursor change? Click on the link and see where the link takes you. Is Amazon the correct destination? If so, you have successfully created a hyperlink using HTML code!
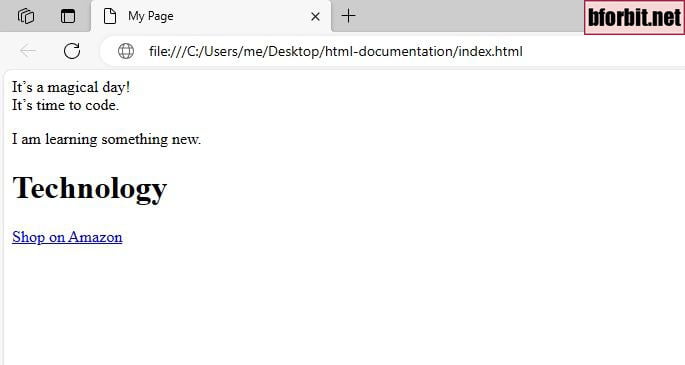

To recap, you added a new paragraph underneath your existing text, followed by an anchor tag indicating a hyperlink reference to Amazon’s website. You used the words “Shop on Amazon” to represent your link on your webpage. You then ended the hyperlink tag as well as the paragraph tag. Great job!
Note: if you click the back button to go from Amazon’s site to your own page, you’ll likely notice your blue link is now purple. The computer recognizes you visited the link and changes the color by default. Color changes can be customized using CSS.
Now our page consists of text, so adding an image makes a great final touch to our basic webpage. You can add a picture located on your computer or use one found on the internet. For this tutorial, we will look for a picture online, save it to our computer, and link it to our webpage.
Using our browser, we’ll visit a royalty-free image website like Pexels to find a picture. When using pictures on your webpage, it’s important to give credit where it’s due or opt for images without copyright, found on sites like Pexels.
On Pexels, I’ll search for “technology,” and find a picture.
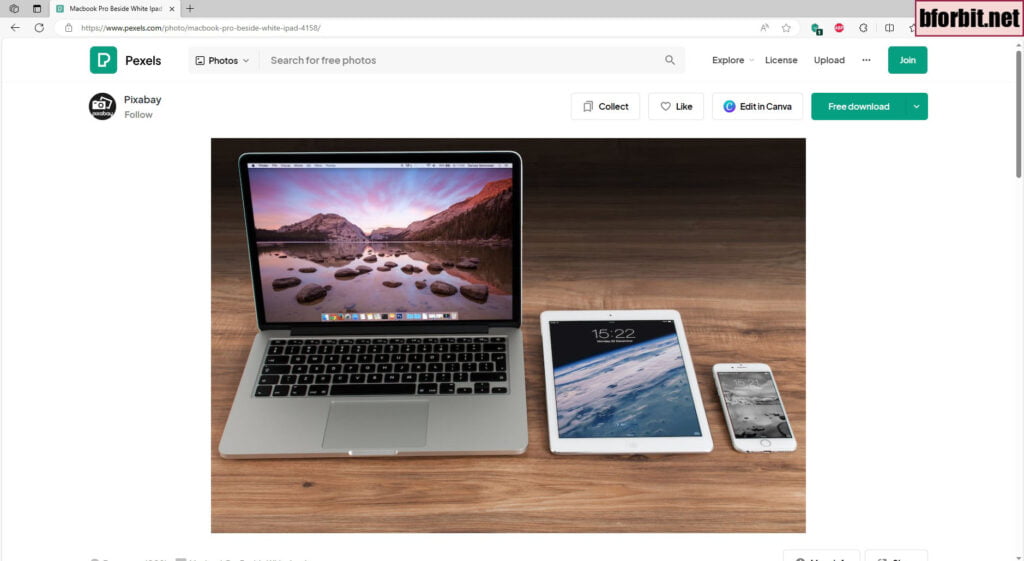
In the upper right corner, click the arrow within the green Download button and choose the Small option, followed by “Download Selected Size.” Your image will likely download to your computer’s default folder, like Downloads. Find the image on your computer and move it to the same location as your webpage file (index.html). One method is to right-click image file, left-click Cut, and then right-click Paste the file once you’re in the right location on your computer. Having the image file in the same location as your HTML file will help streamline the linking process and ensure the image displays properly on your page.
Let’s change the name of our image file. You can achieve this by right-clicking the file and choosing “Rename.” I will name my picture “devices.”
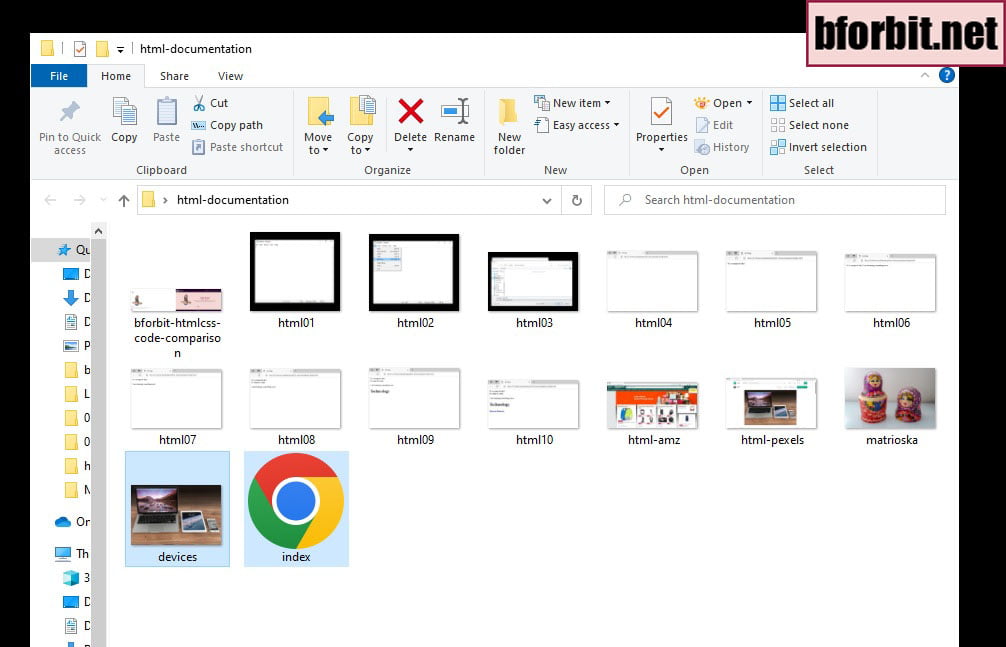
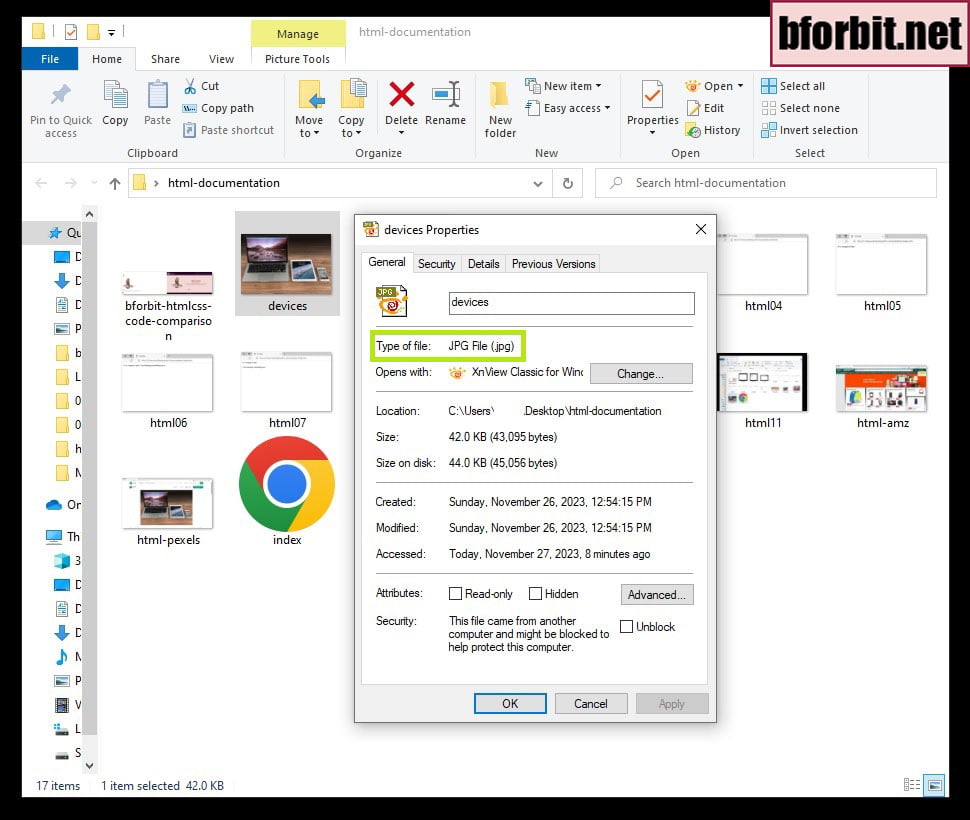
Note: Take note of the image’s file extension. Digital pictures appear in different formats, like .jpg or .png. You can check this by opening your picture in your default image viewer and checking the full file name, normally indicated somewhere at the top of the window. Another way to check is by right-clicking the image file and viewing the properties. In this case, my file’s format is listed as .jpg.
Returning to our index.html file, where our code awaits its final piece, let’s proceed below the Amazon shopping link. Here, we’ll introduce the image element using the <img> tag.
<html>
<head>
<title>My Page</title>
</head>

<body>
It’s a magical day!

<br>It’s time to code.

<p>I am learning something new.</p>

<h1>Technology</h1>

<p><a href="https://www.amazon.com">Shop on Amazon</a></p>

<p><img src=""></p>

</body>

</html>
In this context, “img src” denotes the image source. Through code, the image source is represented by the name and extension of our picture file and enclosed within quotation marks. Insert the name of your image file and its extension. In my case, I’ll use “devices.jpg.”
<html>
<head>
<title>My Page</title>
</head>

<body>
It’s a magical day!

<br>It’s time to code.

<p>I am learning something new.</p>

<h1>Technology</h1>

<p><a href="https://www.amazon.com">Shop on Amazon</a></p>

<p><img src="devices.jpg"></p>

</body>

</html>
You’ll notice that the image tag does not need an ending image tag because it’s self-closing. Save your page, and check your code in your browser. If you see your image underneath your text, you have successfully linked your image in your webpage. Congratulations!
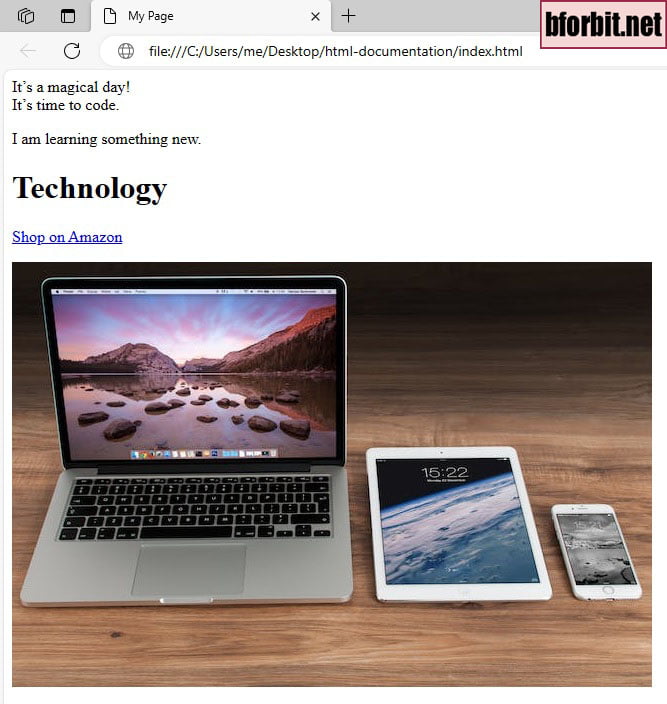
In this tutorial, you learned how to set a basic framework of a webpage using HTML code. You defined the main HTML tags and nested many more tags within. You learned the simple components of the head and body of a page, the latter being the ultimate container for all code viewed in the browser. You learned how line breaks and paragraphs can create separation between text. You included examples of plain text, followed by a heading and a hyperlink. Finally, you added a visual by downloading a royalty-free image from the internet and linking it to your webpage.
Keep in mind that your HTML file and image are accessible only on your computer, not online for the world to see. In web development, you would have to find a webhost to house your files on a server before the public can see them. Free hosting options exist as well as paid versions to make this happen.
You might notice this page looks simple, but remember, HTML is the skeleton of a webpage. Hopefully this basic tutorial gives you an idea of what it’s like to code. If you choose to continue your coding journey, you’ll learn even more tags and languages that work together to upgrade your webpage.
If you want to dive deeper in coding, FreeCodeCamp offers certifications such as “Responsive Web Design in HTML and CSS.” For a more visual and interactive learning experience, explore some of the free courses on Scrimba, like “Learn HTML and CSS.”